Thursday, March 17, 2016

CHOWING DOWN ON SLOPPY JOE'S

As most of you know, I'm always fiddling with my recipes to make them even better, so today, I set out to enhance my Sloppy Joe recipe that is found in One Menu at a Time. For those of you who don't have a copy of the book, I'll post both recipes.


    OLD RECIPE

2 tbls olive oil
1 large onion, chopped
1 lb ground beef

1 tbl cider vinegar
1 tbl Worcestershire sauce
1 tbsp. brown sugar
1 1/2 tsp Dijon mustard
1 tsp salt
3/4 cup ketchup

  NEW RECIPE

2 tbls olive oil
1 large onion, chopped
2 large cloves garlic, minced
1 lb ground beef

Sauce:
3/4 cup ketchup
3 tbls brown sugar
1/2 tsp cinnamon
1 tbl cider vinegar
salt to taste
 Add the oil and the onions to a skillet and sauté until translucent

 Break the ground beef into tiny pieces so it's not clumped together, and add to the onions mixture. Sauté until ground beef is no long pink
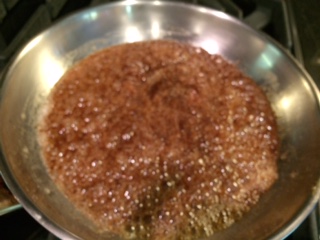
 Using a measuring cup, add the sauce ingredients, stir and taste to make sure you're happy with the flavor and it doesn't need you to increase any of the items.
 Pour over top of the ground beef mixture and combine until thoroughly incorporated.
 Aaaaaaaah, we're finished and ready to chow down on this easy meal!
 
Serve these open-faced on a hamburger bun with a side of coleslaw and/or French fries.
 
 
Bon Appetit!


Friday, February 19, 2016

THANKSGIVING IN A BOWL!

I made turkey soup today. There's nothing more down home or delicious to me than homemade soup, and turkey is my favorite. To me, the turkey soup is just as important as having the turkey on Thanksgiving. So, with that thought, I actually store the extra stuffing, the gravy and carcass in the freezer until I'm ready to make this. And folks, that's exactly what I add to the soup. I don't measure anything out--it's whatever I have in the freezer and refrigerator.


In this pot, I have the carcass, carrots, celery, onions, sweet potatoes, chicken stock and chicken stock. You can add water if you like, but I prefer the rich taste of the stock. Once I done that, I let it simmer for an hour or more, then remove the carcass and place on a tray. While this is steaming, I'll add the leftover stuffing, the gravy, and if I have mashed potatoes, I'll add those too. It makes the soup a little thicker and it's a real meal in a bowl.


Once it's done, I remove the carcass, and as you can see, I got a bit of the vegetables, but don't fret, all that is going back into the pot. Taking two forks, I remove all the meat I can from the carcass and transfer it to another sheet pan, along with my veggies.


 Here's all the meat I got off the carcass. Isn't it amazing? And that's why I love making turkey soup afterward.
 
And Wella! I have the most satisfying BOWLFUL OF THANKSGIVING, served with a salad and garlic bread.

Tuesday, February 2, 2016

DREAMY, CREAMY SCONES

Gosh, it's been ages since I've posted! There's good reason for that. I was away and sick when I returned, which lasted three weeks. But now that I'm okay, I'm back cooking and baking. I hope you like today's recipe. It's a favorite of mine and called Creamy Scones. Before I give you the recipe though, let me tell you a little story about why they're so special to my husband and me.

Several years ago, we were on a cruise, and at one of the ports of call, we visited a French pastry shop and had the most wonderful scones. For an entire year, I made several batches of scones to no avail. Nevertheless, I didn't give up, and thank God I didn't because these taste just like them. They're rich and delicious!

~~~~~~~~~~~~~~~~~~
 
PREHEAT OVEN TO 400 degrees
 
1 stick butter
2 cups all purpose flour
3 tbls granulated sugar
2 1/2 tsps. baking powder
1/2 tsp salt
 
2 tbls brandy
1 egg, beaten
6 tbls half-half, heavy cream or buttermilk
1/2 cup currants, raisins, chocolate morsels
 
Add the dry ingredients to a mixer bowl. Using the paddle attachment, place a towel over top of the head of the mixer to prevent the flour from flying out everywhere, on low until you have fine crumbs.
 
While the mixer is running, add the wet ingredients until the dough sticks to the paddle. Add the fruit or morsels and spin a few more times until incorporated.  Remove the dough onto the counter covered with plastic wrap and roll the dough out to a half-inch thickness.
 
Using a glass or cookie cutter, cut out 12 circles and place on sheet pan. Using an egg white, brush the tops of the scones and sprinkle raw sugar over top of each scone. Bake for 12-15 minutes.
 I use saran wrap on the counter to keep it clean so clean up is nice and easy!

 Here, I've rolled the dough thickness to 1/2 inch and am using the largest cutter because we like big  scones. :-)


 Here, I've used the heavy cream to coat the tops because I had it handy, then sprinkled the sugar over top. You can see the top left scone is coated with the sugar.
 
 
The finished product. Oh yum!
 
 Bon Appetit!


Sunday, January 10, 2016

CHICKEN ITALIANO WITH BRANDIED PEACHES

4 chicken breasts, trimmed of all sinew and fat
1 tablespoon granulated garlic
1 cup seasoned Italian breadcrumbs
3 tablespoons Pecorino Romano cheese, grated
1 tablespoon olive oil
2 tablespoons butter


PREPARE CHICKEN AND MEASURE OUT ALL INGREDIENTS FIRST.

To flatten the chicken breasts to one half-inch thick, I place a kitchen mallet inside a plastic bag and hammer away.

Make sure to remove the sinew and fat from chicken breasts. Mix the granulated garlic, breadcrumbs, and the grated cheese together in a large baggie and after shaking, set aside. Dip the chicken in the egg wash first, then place inside plastic bag and shake making sure to coat all sides of the chicken.

Using a skillet, melt butter and add the olive oil into the pan. Using medium heat, fry each piece of chicken until golden, keeping it warm until serving.


PEACH TOPPING

2 tablespoon butter
3 tablespoon brown sugar
1/4 teaspoon cinnamon
1/4 cup brandy
1 tablespoon cornstarch
1/2 cup water
1 tablespoon lemon juice
salt to taste


 Melt the butter, add the brown sugar and cinnamon and allow it to bubble. Unless you know how to flambé remove the pan from the burner before you add the brandy. Blend with a wire whisk.


Add the 1/2 cup water mixed with the cornstarch and whisk until thickened. Add the lemon juice and whisk again. Once you're satisfied with the taste, add 1 cup sliced peaches!
 
 Plate the chicken onto a plate, spoon peaches down the middle and spoon sauce over top.


Saturday, January 2, 2016

SLOPPY JOE'S

Easy, easy meal the day after the New Year. Fifteen minutes from start to finish.

1 lb ground beef
1 medium sized onion, chopped
1 tbls olive oil
1/4 cup brown sugar
2 tbls Worcestershire sauce
2 tbls cider vinegar
1 tbls Dijon mustard
1 1/2 cups ketchup

Add the olive oil, the ground beef and onions in a sauce pan and cook until browned.

Measure out the remaining ingredients into a measuring cup, whisk to combine and pour over top of the beef mixture, stirring until completely incorporated.


Serve open faced with Sloppy Joe mixture over top.


Sunday, December 27, 2015

HOMEMADE VEGETABLE SOUP


I love soups in the winter!  That incomparable smell of everything cooking, the aromas in every part of the house, the steam on the windows from the combination of warmth inside hitting the cold glass,  and my stomach growling big time anxious to have a bowl full of vitamins. Shhh, don't tell the kids--they're allergic to vitamins!
 
Soup brings me back to a simpler time when all I had to do was worry about  my schoolwork. It brings me back to my mother's kitchen on Monday's that told me, 'this is home' the minute I came bustling through that door. And now, I give you my mama's recipe for a bowlful of cheer!


3 tablespoons olive oil
1 cup celery, chopped
1 medium onion, chopped
1 cup carrots, chopped
1 cup green beans, chopped
2 whole zucchini, chopped
1 cup sugar snap peas
salt and pepper to taste

1/4 cup fresh parsley, rough chop
2 cans tomatoes, chopped with juice
2 white potatoes, cubed
2 teaspoons mustard
1/2 parmesan cheese

64 ounces vegetable stock--not broth--stock.


In a large soup pot, add the oil and the first five vegetables and slightly sauté. Add the tomatoes, the potatoes and the stock. Bring it to a boil, then lower until it's simmering. Just before serving, add the parmesan cheese and mustard stirring to combine. Cook for approximately 1 hour.

Serve with salad and biscuits 10-12 servings.

Sunday, December 20, 2015

CHICKEN ITALIANO WITH BRANDIED PEACHES

4 chicken breasts, trimmed of all sinew and fat
1 tablespoon granulated garlic
1 cup seasoned Italian breadcrumbs
3 tablespoons Pecorino Romano cheese, grated
1 tablespoon olive oil
2 tablespoons butter


PREPARE CHICKEN AND MEASURE OUT ALL INGREDIENTS FIRST.

To flatten the chicken breasts to one half-inch thick, I place a kitchen mallet inside a plastic bag and hammer away.

Make sure to remove the sinew and fat from chicken breasts. Mix the granulated garlic, breadcrumbs, and the grated cheese together in a large baggie and after shaking, set aside. Dip the chicken in the egg wash first, then place inside plastic bag and shake making sure to coat all sides of the chicken.

Using a skillet, melt butter and add the olive oil into the pan. Using medium heat, fry each piece of chicken until golden, keeping it warm until serving.


PEACH TOPPING

2 tablespoon butter
3 tablespoon brown sugar
1/4 teaspoon cinnamon
1/4 cup brandy
1 tablespoon cornstarch
1/2 cup water
1 tablespoon lemon juice
salt to taste


 Melt the butter, add the brown sugar and cinnamon and allow it to bubble. Unless you know how to flambé remove the pan from the burner before you add the brandy. Blend with a wire whisk.


Add the 1/2 cup water mixed with the cornstarch and whisk until thickened. Add the lemon juice and whisk again. Once you're satisfied with the taste, add 1 cup sliced peaches!
 
 Plate the chicken onto a plate, spoon peaches down the middle and spoon sauce over top.


Sunday, December 13, 2015

CHINESE BEEF AND BROCCOLI WITH MUSROOMS

Here's a recipe sure to please Chinese food lovers! Again, it's easy, fast and delicious!

Add 1 cup rice to boiling water, or use a rice cooker. Give the rice a head start so it's cooked and ready to go when your beef dish is ready.

1 pound flank steak, thinly sliced
1/3 cup corn starch
2 tbls oil
4 cloves garlic, minced
1/2 teaspoon ginger paste
2 cups sliced mushrooms
2 cups broccoli flowerettes
1/2 cup brown sugar
1/2 cup beef stock
1/2 cup soy sauce

1 tbls cornstarch

As mentioned before, mise en place (pronounced me sen plas) which means prep the ingredients by measuring and cutting everything beforehand. The cooking of this dish is so fast, you'll want to make sure you don't have to stop in between to prep something. Besides, it's quick and easy!

To give you a sense of value of mise en place, here's an example of how my day played out after I'd started my personal chef service.

After I'd graduated from culinary school, I did all the legwork to start my personal chef service. When a local newspaper reporter got wind of my service, he called and interviewed me. To my surprise, my phone was ringing off the hook and by the end of that day, I was immediately booked solid and cooking for twenty-one families per month, some on a weekly basis, others monthly. The service included me preparing a menu based on their meal preferences which would lead to me preparing five different meals for the client.

The day of service, I'd leave my home and head to the supermarket by 8:00AM, then go straight to their home and begin prepping the ingredients by 9:15AM for every single meal. Sometimes it seemed like I'd never get done prepping, but I was always ready to start cooking by 12:00 Noon. In addition to the meals, I was baking cornbread or biscuits, salads and a dessert.

The meals were cooked in their homes because I didn't have a commercial kitchen. Once cooked, the food was divided into serving containers, double wrapped with a label for reheating, and stored in their refrigerator or freezer. After cleaning up the mess I'd made in the kitchen, I'd set the table, then head for home. By prepping ahead of time, I was done for the day and ready to leave for home by 2PM. That my friends, is the value of mise en place!

So what are we waiting for? Let's get busy!

 
This is the ginger paste I use. You can find this tube in the refrigerated section of your supermarket with the other herbs in the vegetable aisle.


Slice the beef thinly on an angle. Slice mushrooms and break broccoli into small flowerettes. Using a large plastic bag, add the cornstarch and the sliced beef, shake to coat. Using a well-seasoned wok, add the oil and turn the flame up to high to heat the wok.
 Add the garlic, ginger and dusted beef slices to the hot oil and fry, turning frequently until slightly brown.


Remove the beef and place in a bowl until ready for use at the end. Add the vegetables to the hot wok, and pour all but 1/4 cup of the stock, soy sauce and brown sugar mixture. Continue to turn frequently. The soy and stock help to steam the vegetables. Remember, you want the veggies crisp tender.
 
 Before adding the remaining soy mixture, add 1 tablespoon of cornstarch to it and stir until completely dissolved. Add to the vegetables and continue turning until thickened, then add the beef back in, turning to combine until everything is covered evenly with the sauce.
 
 
And ta da! You have Chinese Beef, Mushrooms and Broccoli served over rice.


 I hope you enjoy this dish as much as we did! I trialed this recipe last week for the first time to make sure it was good enough to share with you. Well, we did, so here's the recipe. Okay, so now it's your turn!

Monday, December 7, 2015

The Best and Easiest Fettuccine Alfredo

After having a dinner party on Saturday night, the last thing I wanted to do for Sunday night's dinner was make something that required work. Scrounging around in the refrigerator, I came up with this recipe. I swear, this dish was so incredible, you'll make it often.

I didn't have fettuccine in the house, so I used linguini instead. Use what you have in the house and refrigerator.

CHEF'S TIP: Want to cook like a pro? Measure out all your ingredients first before you even start to cook. The French call this mise en place which means you get all your tools ready and the ingredients measured out. If you do this step with every recipe, you'll be amazed at the speed with which you'll produce some wonderful recipes. Having to stop to measure out ingredients in between makes for a long drawn out process which can also ruin what you're cooking because of the lapse in time.


INGREDIENTS:

3 tbls sweet butter
2 tbls all purpose flour
1/2 tsp nutmeg, ground
2 cups heavy cream, half and half or fat free cream
1/2 cup grated parmesan cheese
1/2 blue cheese, crumbled
Salt and Pepper to taste

8 ounces linguini, cooked al dente


Using medium-low heat, melt the butter in a heavy saucepan on the stove. Once melted, add the flour and whisk until completely smooth allowing it to bubble just until it's a golden color to cook the flour.

 Turn off the heat and pour in the cream and whisk until completely combined and smooth. Add the nutmeg and whisk until blended. Turn the heat back on and add the two cheeses, again whisking until melted and combined. Taste the sauce before adding the salt and pepper. Remove from the burner. Test to see if sauce is thick enough to coat the back of a spoon. Dip the spoon into the sauce, then using your finger, draw a path through the center of the spoon. If the 'path' remains, the sauce is perfect.


Rinse the linguini in hot water, drain well and add to the saucepan, swirling around until every strand of pasta is covered. Top with a sprinkle of parsley and parmesan cheese and serve.


This recipe makes 2 or 3 servings depending on portion size.


Most recipes call for 1 1/2 cups of cheese to thicken the sauce, but since I'm calorie conscious, I use less cheese and add the flour to thicken it.

Bon Appetit!

Sunday, November 29, 2015

HOLY CANNOLI SUNDAY!


Cannoli's are one of those rare special treats everyone enjoys, and even if you've just stuffed your face, there's always room for an Italian cannoli.
 
One of the things I've learned about making them through my research is that no recipe ever tells you to drain the ricotta. It's as if you're supposed to know. So before you embark on trying this recipe, purchase your ricotta cheese two days before, as well as a package of cheese cloth. Follow these simple steps and you'll be baking like a professional. This recipe makes 16-18 cannoli, but don't fill them all at once. Just fill the amount you'll be eating--usually one per person.
_______________
 
1 ½ pounds whole milk ricotta cheese
Cut a piece of cheesecloth approximately 17" long. Using a tray, unfold the cloth all the way and lay it down on the tray so you can scoop the contents of the ricotta right into the middle. Now bring the four sides up, making sure the cheese is completely covered and tie as tightly as you can. Using the handle of a wooden spoon or knitting needle, slide it under the knot or bow, and hang the sack over a deep enough bowl so sack isn't touching bottom. Do this 2 days prior to making the filling.

This photo is after the first day. It has already drained a half inch of liquid. Today, when we were ready to use the ricotta, there was at least an inch of milk on the bottom of the container.
 
 
CAUTION: If you bypass this step, your cannoli filling will be watery, run out the sides of your shells, be a major mess to eat, and not a pretty sight.


Once drained, empty the contents of the cheesecloth into a mixer bowl, add the confectioner's sugar, vanilla, cinnamon, and beat on a medium high setting for about 10 minutes.

Drained ricotta
1 ¼ cups confectioner’s sugar
2 tsp vanilla extract
1 tsp cinnamon

Remove the bowl from the mixer stand, add the following and mix by hand:

½ cup candied fruit, finely chopped
¼ cup mini semi-sweet chocolate morsels


While the filling is chilling,(hey, that rhymes) you can prepare the dough for the shells OR you can buy the premade shells, which are just as good. Nevertheless, I'll give you the recipe just in case you're feeling ambitious, but I highly recommend buying the shells.

Here are a few more pictures from our fun day.
 
 I'm demonstrating piping in the filling into the shells with a pastry bag that I've only used a coupler. A coupler is what is used to hold the decorating tip in place, but if you're just filling shells, such as I am above, you don't use a pastry tip.


Here's Julie dusting her filled cannoli with confectioners
 
_________
 

CANNOLI SHELLS (you'll need 6 6" aluminum tubes that are 3/4' in diameter--can be purchased at specialty shops.)

Combine the following ingredients and sift into a mixer bowl:

3 cups all-purpose flour
¼ cup granulated sugar
1 tsp cinnamon
½ tsp salt

Add 2 tbls Crisco into the mixture and using the paddle on medium high, mix until the pieces are the size of small peas.

Beat 2 eggs and pour into the mixture, paddle until well blended

Now add:
2 tbls white vinegar
2 tbls cold water

Paddle to combine. The dough will form into a ball and pull away from the sides of the bowl,  then turn  dough onto a lightly floured surface and knead, if necessary. Wrap in saran wrap and chill the dough for 30 minutes.

Fill a deep saucepan with oil and let it heat until it reaches 360 degrees.

Roll the dough out and cut oval pieces that measure 6x4.5". Wrap the oval loosely around the cannoli tube and seal with beaten slightly egg whites. Deep fry for about 8 minutes or until golden brown. Move onto paper towels to drain. Once cooled, they're be ready to fill.

Remove the mixture from the fridge, fill a pastry bag half way with the ricotta mixture and pipe into each end of the shells. You can dip each end of the cannoli with chopped nuts, colorful sprinkles, or nothing at all. Dust the cannoli tops with confectioner's sugar and serve. Makes 16-18 cannoli


Wednesday, November 25, 2015

NOT YOUR ORDINARY PUMPKIN CREAM PIE

I've tried something very different with my pumpkin pie this year. I love pumpkin pie. I don't have it other times during the year, so it was important to me not to ruin the integrity of the taste . . . and I didn't! I'm posting this today just in case you want to try it along with me. Here's the recipe.

1-15 ounce can of pumpkin
3/4 cup granulated sugar
1/2 tsp salt
1 tsp cinnamon
1 tsp ginger
1/2 tsp nutmeg
1/2 tsp ground cloves
6 ounces evaporated milk
1 1/4 cup heavy cream
3 eggs, beaten

PREHEAT the oven to 350 degrees

Pour the contents of pumpkin into a mixer bowl, and add the sugar and spices. Whip to thoroughly blend. In a 4 cup measuring cup, drop the eggs in one at a time and whisk, add the evaporated milk and heavy cream and blend to thoroughly mix. Pour the liquid into the pumpkin mixture and beat to incorporate.
 

Pour the mixture into a baking dish and transfer to the oven.
 
Bake in 350 oven for 1 hour and 15 minutes or until knife comes out clean.


Cool and return to refrigerator overnight so it nice and cold. If you don't do this step and mix it with the whipped cream while it's warm, I can promise you, you'll have soup.

Shape the pie crust into the pie plate and bake according to manufacturers directions.

3 cups cold heavy cream
1/2 cup granulated sugar
2 tsp vanilla

1 cup pecans, finely chopped

Whip together until semi-firm peaks form.

In your mixer bowl, spoon all the custard into the bowl and mix until it breaks up. Add 3/4 of the already whipped cream and beat on low until blended.


 Scoop the mixture into the already baked pie shell, spreading until even.


Add remaining whipped cream over top, sprinkle with chopped nuts and you're ready to serve.

8-10 servings

Happy Thanksgiving, my friends!

Sunday, November 22, 2015

MAMA'S STOVETOP POT ROAST

3 lbs eye round roast
1/2 cup all purpose flour
1/2 tsp granulated garlic
1/2 tsp granulated onion
salt and pepper
4 large carrots, sliced
1 medium sized onion, chopped
2 tbls Crisco
32 ounces beef or chicken stock


As you can see, I do not use the traditional chuck roast for my pot roast. The reason is because I like my pot roast to slice more like roast beef than stringy dried pulled beef. However, if that's your choice of cut of beef, by all means. It's not going to ruin the taste. It's more the texture thing.

Okay, trim the fat off the roast leaving a thin layer on. Using a gallon-sized plastic bag, add the flour and seasonings and shake to blend the seasonings. Place the roast inside and shake to coat the entire roast. Save the bag if you have left over flour. You'll use it to thicken the gravy.

In a five quart heavy pot, melt the Crisco just to brown your roast on all sides--ends too. Once you've seared the meat and you have a nice crusty coating that has been browned, you've sealed in the juices.

Leave the roast right in the pot and add the 32 ounces of stock and allow to simmer for 1 1/2 hours--that's a half hour per pound.

When the roast is done, I remove the meat to a serving platter, cover until you're ready to slice it after you've made the gravy. Pour the juice, onions, carrots right into the pan into the blender to emulsify for the gravy. Do this in batches because juice will be hot. Add two tablespoons of the left over flour, cover and whirl around to thicken. Check to see if the gravy is thick enough. If not, add another tablespoon of flour. Season with salt and pepper to taste. Now, you're ready for slicing.

Slice the meat, and serve on a platter.


I serve this roast with mashed potatoes, vegetables--typically string beans, cranberry sauce and lots of gravy. This is my absolute favorite fall meal.

IF EVER YOU NEED MORE CLARIFICATION ON THESE RECIPES, SEND ME AN EMAIL. I'LL ALWAYS ANSWER.